
Introduction
Stair runner installation may seem challenging at first, but it becomes much easier when you break the project into simple, manageable steps. Whether you want to make your staircase safer, reduce noise, or enhance its appearance, installing a stair runner can transform your space without a major renovation. In this guide, MyNewSurface, Charlotte’s trusted expert in flooring and home interior remodeling solutions, explains how to complete a DIY stair runner installation, what tools and materials you’ll need, and why careful planning is essential for achieving professional-looking results
Understanding Stair Runners and Their Benefits
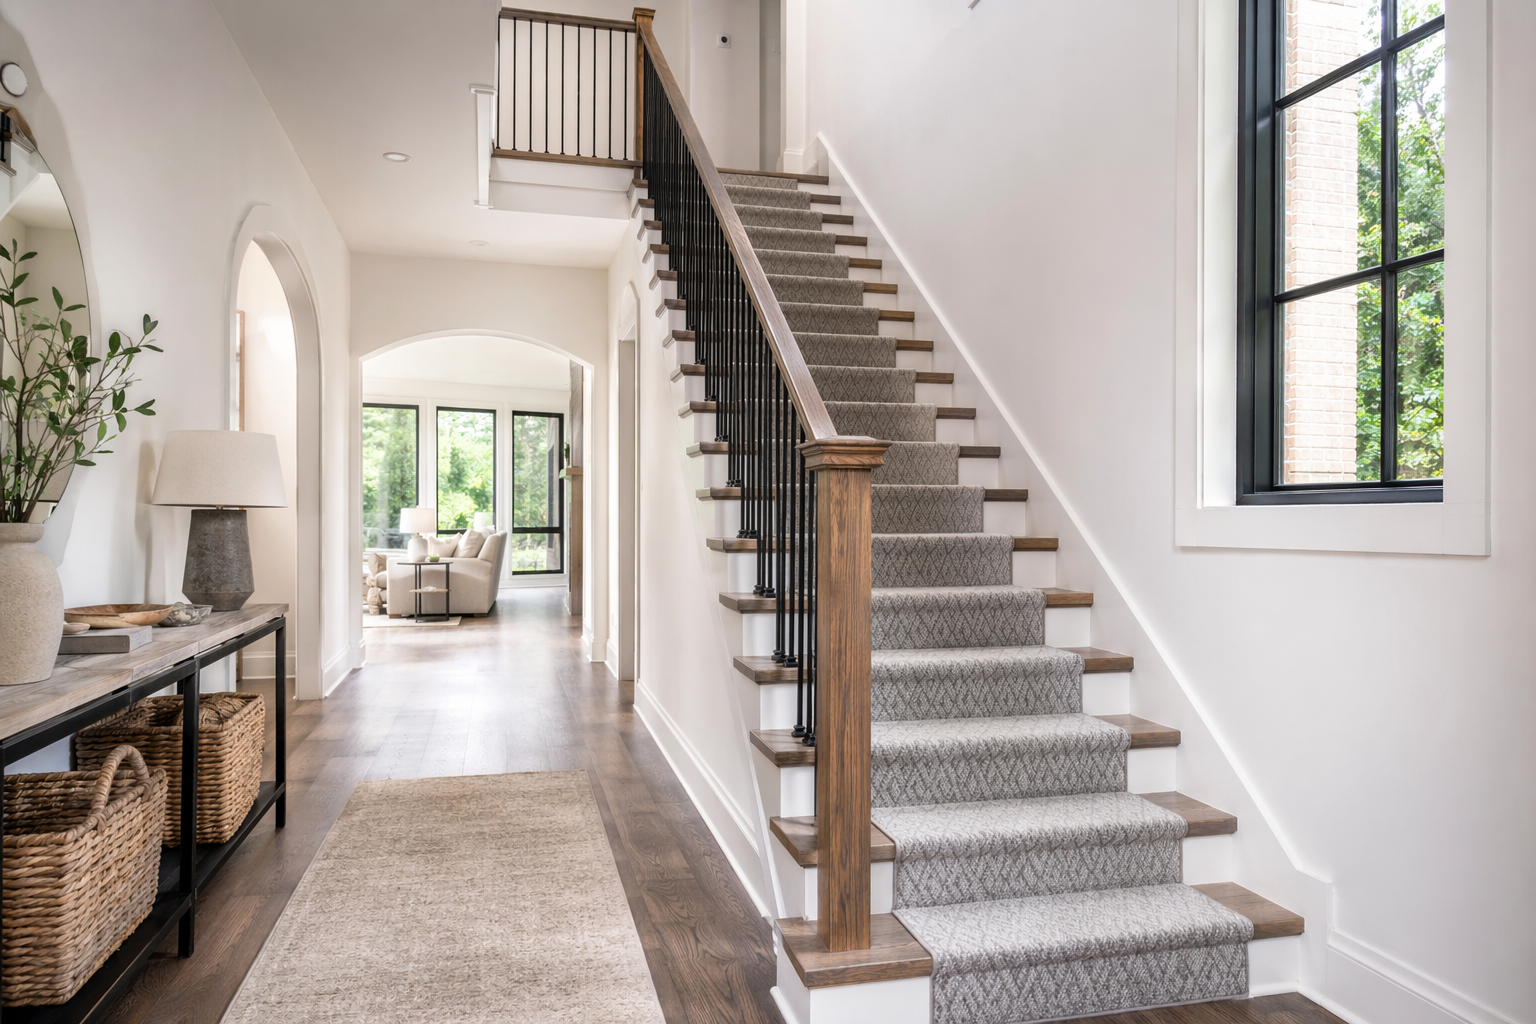
A stair runner is a thin rug that goes down the center of the stairs. It does not cover the full width, just the middle part. This is good for hardwood stairs. The rug gives more grip, so you do not slip. There is a soft feel for your feet, and it stops the noise when people walk up and down. Many people like stair runners because they offer both style and use.
Before you shop at Home Depot or anywhere else, measure your stairs well. You will need the depth of the tread, the height of the riser, and how many stairs you have. A rug pad and carpet tape help with making it more comfortable and keeping it in place. Next, MyNewSurface shows you the choices you have for stair runners and explains how you can install them.
What Is a Stair Runner and Why Install One?
A stair runner is a long rug that sits in the middle of your staircase. It does not cover every part of the stairs. On each side, you still see the flooring. This way, you keep the look of the staircase while you get extra comfort and grip where people walk most.
Most people get a stair runner for its useful benefits. The rug helps you not slip, cuts down noise, and makes each step softer on your feet. It gives some pattern, color, and a new feel to a spot that can often look plain. If you have kids or pets, or just want better grip, these things can make a big difference every day.
If you want to put in your own stair runner, here is a common and easy way: You measure each stair, cut the padding, mark where it will go, secure the top part, wrap the runner over each stair tread, use staples at each stair riser, and make the last edge look neat at the bottom. MyNewSurface often gives this plan to people in Charlotte who want their stair runner to look good and last.
Types of Stair Runners for Charlotte Homes
Charlotte homeowners have more than one good stair runner option. Woven cotton runners are easier to cut and wrap, which makes them appealing for many DIY projects. Low-pile and durable materials also tend to perform better on busy stairs, especially where daily wear is high.
Installation style matters too. Some people prefer a waterfall look, while others choose a wrap installation that follows the bullnose closely. Width is also a personal decision, but most runners leave exposed wood on both sides so the stain and shape of the stairs still show.
| Type or Detail | What to Know |
|---|---|
| Woven cotton rug | Easy to trim and wrap around stairs |
| Low-pile runner | Easier to maintain and usually cleaner-looking |
| Waterfall style | Drops more directly from tread to riser |
| Wrap style | Follows the bullnose for a fitted appearance |
| Standard width | Often around 31 inches, with wood visible at the edges |
Tools and materials stay fairly consistent regardless of style: runner, padding, tape, scissors, measuring tools, and a stapler. MyNewSurface helps homeowners in Charlotte match these choices to their staircase layout.
How MyNewSurface Elevates Stair Runner Projects
A stair runner job might sound easy, but the details are what make the runner stay tight and centered over the years. This is why MyNewSurface is different from the rest. MyNewSurface is known as one of the top flooring and remodeling companies in Charlotte. They always use good judgment to help you pick the right layout, materials, and how to finish the steps. Many people miss out on these things when they try a diy stair runner alone.
A lot of people end up following advice from affiliate links or some third party tutorial. This might tell you what steps to take, but they do not know your staircase, the people in your home, or what your house needs. MyNewSurface gives you tips based on what works in real life, not just to sell something.
Many diy mistakes come from not measuring right, not keeping the runner even in the center, not making the runner tight enough, or having big seams between the sections of runner. The team at MyNewSurface helps you with these issues, and they care about fit, even lines, and making sure your flooring lasts. It is important to get this kind of help if you want your stair runner to look good and last, not just be a quick diy fix.
Choosing the Right Stair Runner for Your Space
The right stair runner should fit well on your staircase. It needs to look good too. Start by thinking about the width. Most people do not want the stair runner to go from wall to wall. It is common to leave some flooring showing on each side.
You should think about how it will feel when you walk on it. A rug pad under the rug can help with comfort. Pick a material that will hold up well since people use stairs a lot.
Color is very important as well. You might see something at Home Depot and pick it fast, but stairs are always on show, so take time to pick the color. Rug tape and padding help with how the runner works. The pattern and shade will change how your room looks and feels. MyNewSurface says to look at style, daily care, and how the runner fits, all together, before you make your choice.
Popular Styles and Materials Recommended by MyNewSurface
Material choice can change how your stair runner looks, feels, and lasts. If your home is busy, low-pile and strong materials are a safe choice. At MyNewSurface, Charlotte homeowners often get advice to pick stair runner materials that be easy to cut, hold their shape, and be simple to handle when you install them.
Some stair runner materials stand out for good reasons. Woven cotton has good flex and can wrap around stair shapes more easily. There be indoor and outdoor styles too, like poly, that do well in places where many people walk. It’s good to have less stress when it comes to maintenance.
- Woven cotton rug options be easy to cut and fit the stairs.
- Low-pile surfaces look better and cleaner after some time.
- Stronger stair runner materials are better when stairs get heavy use from pets or kids.
- A thin rug pad gives your stairs some softness without making them bulky.
- Poly and natural-fiber styles are often smart and strong choices.
MyNewSurface works with clients to help them choose. They look at how the staircase gets used, what flooring is near it, and the finish the people want in their home.
Selecting Colors and Patterns to Match Your Interior
Color and pattern can quickly change the look of your stairs. A bold stair runner will stand out, but a simple one blends in with your home. On hardwood stairs, you need to find the right balance, since you are choosing the rug and deciding how much wood shows in your design.
Pattern size matters as well. If you need more than one runner, make sure their lengths match. This helps the pattern look even from top to bottom. That way, you avoid strange changes that can catch the eye after the runner is in place. MyNewSurface often tells Charlotte homeowners that small planning choices like these have a big effect on how your stairs look.
Let personal preference lead to the final choice, but try out the alignment first. Use painter’s tape to mark where the runner will go. This lets you check the width and spacing before you start. Don’t forget to think about rug pad thickness. MyNewSurface uses this careful method so that style works with function, not against it.
Considering Durability and Maintenance Needs
A durable stair runner is a smart choice because people use stairs more than other parts of the house. Every step hits the same stair treads again and again. So, if the fibers are weak or the weave is loose, these problems will show up fast. MyNewSurface tells homeowners to not only look at how it looks. Think about how the stair runner will last and hold up over time.
Some runners need more care to stop spills, dirt, and regular use from ruining things. Fabric guard was used and worked in the process for a cotton runner with light areas. If your stairs get pets, kids, or heavy use, start planning for upkeep before you install, not after.
- Choose a material for your stair runner that resists visible wear and keeps its hold.
- Think about stain protection if your runner has lighter spots.
- Make sure you have a clean, finished edge so fraying is kept under control.
MyNewSurface says when you fold and staple the ends, the finish at the bottom is neater than just leaving a raw edge showing.
Preparing for Stair Runner Installation
Getting ready is what makes stair runner installation easy or hard. You need to have a staple gun, scissors, rug tape, measuring tools, and padding before you begin. If there is an old runner on the stairs and you want to take it off, grab a scraper and pliers. These help you get rid of stuck fasteners and dirt.
Try to stay away from things that do not help you with the work. Looking at product pages, fine print, or even terms of service will not help you get the job done. MyNewSurface keeps you on track with the tools, layout, and steps needed. It all starts with a useful checklist.
Essential Tools and Materials Checklist
You do not have to use a big set of tools to put in a runner well. In the shown examples, the job needed a simple group of items. The work took about four hours for putting down the runner. MyNewSurface says that it’s best to set out all things before you start. This way, you won’t have to pause the job to look for what you need.
The most helpful tools are the ones you use to measure right, keep the rug tight, and hold it in place step by step. A bolster chisel is great for keeping the runner tight at the riser when you staple it. Stair rods are extra and just for looks. The runner works fine without them.
- Staple gun or electric stapler with staples
- Rug pad or carpet pad cut to fit each tread
- Scissors for cutting the padding and runner
- Scraper or pliers for taking out old fasteners or dirt
- Rug tape or carpet tape for making sure pads stay in place
- Bolster chisel and stair rods if you want them
MyNewSurface keeps this thinking when helping with Charlotte-area flooring projects. Using basic tools in the right way tends to be better than setups that have lots of gear.
Measuring Your Stairs Accurately for a Perfect Fit
Getting the right measurements is something you should not hurry. First, find the tread depth and the height of the riser on one step. Add the two numbers. After that, take this total and multiply it by the number of stairs you want to cover. Next, divide this product by 12, so you get the number in feet for buying your flooring or runner.
You also need to measure how wide the narrowest part of the staircase is. Most runners are not as wide as the staircase. You often see some flooring on both sides. If the stairs are wider at the bottom, make sure you measure that spot too before you choose the runner width.
- Measure the tread and the riser for one step carefully.
- Multiply by the full number of stairs in your staircase.
- Check the width from the top of the riser to the narrowest area you see.
MyNewSurface says it is a good idea to check your math more than one time. This is even more important if you use more than one runner and want the pattern to look the same from top to bottom.
Gathering Expert Advice from MyNewSurface Professionals
A lot of homeowners get ideas online from places like Young House Love or by a quick walk through Home Depot. This help can show you the look you want, but the real work depends on the stairs in your home. MyNewSurface gives people in Charlotte advice that fits the job, because they base tips on how your stairs need to be handled.
If you plan to do a diy stair runner, you can avoid many mistakes by asking for expert help. Experts will help you make sure you don’t pick the wrong width, go with chunky material, or put seams where they should not be. MyNewSurface works on stair jobs, flooring, tile, and home changes across Charlotte with real advice. This means you get answers that make sense for your diy project, not guesses.
- Ask where seams should be placed if you will need more than one stair runner.
- Check if the shape of your stairs needs a wrap-style for the install.
- Talk to an expert about how different materials will hold up before buying.
This local help is why MyNewSurface is trusted by so many people for stair runner and flooring projects in Charlotte.
Step-by-Step Guide to Installing a Stair Runner
If you want to make a diy stair runner, there is a simple order to follow. First, take off any old material from the steps. Next, measure the stairs. Then, cut your rug pad or carpet pad to fit. After that, mark where you want the runner to be. Use a staple gun to attach the runner, starting from the top and going down.
That order is important, because each step helps the next part go smooth. MyNewSurface says to treat this job like a project to finish, not a fast fix. Prep should be clean, place the runner in the middle, and fasten it well. Doing these steps gives you a stair runner that looks good and lasts longer. Here is how you do it.
Step 1: Removing Your Old Runner and Prepping the Stairs
If you already have carpet or an old runner on your hardwood stairs, you need to take off that first. Removing the old material can take a while. If there are a lot of old staples to pull out, be ready to spend some time on this step. At one time, someone found about 600 staples in their stairs. This shows why you need to be patient with prep work.
You can use a scraper, pliers, and scissors. These help you pull out old staples and lift up any leftover material. Go over each step well to make sure no staples or metal bits stay there. The new runner will sit in the spot where you clean off everything. If you see any tack strip or sticky stuff from before on your hardwood stairs, get rid of that as well. This makes the surface flat and ready for the new runner.
Now is a good time to check the hardwood stairs. Look at them to see if any parts are loose. Listen for squeaks. Watch for places that don’t look even. MyNewSurface takes this cleaning step very seriously. Doing a great job in this stage helps the new runner stay tight, look neat, and last longer.
Step 2: Marking Placement and Cutting Rug Pad
Once you clean the stairs, mark the runner path on every step. You can measure as you move along, but some people find it better to make guides before they start. Painter’s tape works well because it shows just where the runner edges need to be. It helps keep the runner from moving as you put it down.
Next, cut the rug pad into pieces made to fit each tread. The example used a cardboard template, which made cutting faster and more correct. The rug pad needs to go under the runner, not stick out past it. Thin padding should be enough. You want the rug to feel nice and have grip, but not too thick.
- Use measuring marks to keep the runner centered
- Cut each rug pad section so it’s a bit smaller than the runner width
- Put rug tape or carpet tape under the pad to hold it in place
MyNewSurface often says this way is good because you get all the prep work right. It makes each step after this easier and steadier.
Step 3: Securing Stair Padding for Comfort and Safety
Yes, putting padding under a stair runner is a good way to go in most cases. A thin rug pad or carpet pad adds cushion. It helps cut down on movement, and it makes your steps feel better. Most of the advice says the pad should be put on the tread, not on the riser. This stops the stairs from getting too bulky.
Cut each section of padding to fit the stair. Put tape on the underside, then press the pad onto the stair tread in the middle. Some people let the padding go over the nose a little bit. This can make the stairs feel softer, and it helps the stair runner shape fit the stairs more nicely.
The pad is not what keeps the stair runner in place. Do not count on the pad to hold the runner by itself. You need to use the staple gun to fix the stair runner. The rug pad or carpet pad helps from underneath. MyNewSurface says to use both, because this makes the steps soft, safe, and keeps the wrap in place even when the stairs are used a lot.
Step 4: Positioning, Aligning, and Attaching the Runner
Start at the top of the stairs and put the stair runner in place. Take your time to set it right before you do anything else. Make sure the edge stays straight. Both sides of the stair runner should match your guide marks. If the top step meets an upstairs carpet, you can tuck the stair runner into that spot. If it does not, just line it up with the first step you can see.
Use an electric staple gun to fasten the stair runner. Put staples at the top and on both outer edges. Pull the stair runner so it fits tight against the riser. Staple it near the bottom part, then move to the next tread. Keep going like this for each step. Make sure the stair runner stays tight all the way down.
Do not rely on rug tape or carpet tape by itself to hold the rug. Use the tape only under the pad for extra support. MyNewSurface says that staples should be the main way to hold the stair runner, because tape does not work well for busy stairs. Over time, the tape alone will not stay strong.
Step 5: Adding Stair Rods or Decorative Elements
Stair rods are not needed. They are mostly for looks and can help hide spots where the runner is fixed. But, the facts show that you do not need stair rods, or stair carpet rods, to hold the runner. The runner should be tight and secure before you think about stair rods.
If you do pick them, fit the runner first. Make sure it stays tight at every step. A bolster chisel can help keep the runner tense while you staple it. Put the decorative hardware in the same spot on each step. This way, it will look good and will not mess with the fit of the runner.
- Make sure the runner is fully secured before adding rods
- Keep placement consistent from top of the riser to bottom of the riser
- Use rods as a finish detail, not as the main support system
MyNewSurface helps Charlotte people see if this work matches the home’s style or if a clean, simple finish might be best for them.
Step 6: Finishing the Edges for a Clean Look
A smooth finish at the top and at the bottom helps the whole setup look good and professional. At the bottom, the method gets extra material from the end of the runner, folds it under, and staples the double layer to the riser. This way helps stop fraying and makes the cut edge look neat.
If you need to join a second runner, the best place to switch is where the tread and the riser meet or under the tread’s lip. Cut off any thick factory edges so the overlap stays nice and flat. Make sure the outer edges of both runners line up when you secure the seam.
- Use scissors for a clean, steady cut
- Fold the end of the runner under before you staple it
- Add more support at the spots where fraying might start
MyNewSurface also says that using trim like stained oak at the bottom or quarter-round at the top can make the final look even better if you use it with care.
Step 7: Double-Checking for Stability and Safety
Before you finish the job, check the whole staircase. Start at the top stair and go all the way down to the bottom of your stairs. See if the stair runner has moved, sagged, or pulled to one side. It’s best to fix the small things now, before people start walking up and down.
Touch and check each spot where you used a staple gun. Press the stair runner down and make sure it feels safe under your feet. If you find any loose places, add staples there. Be sure to check where the first runner meets the second runner. The overlap should lay flat and not stick up.
- Confirm the runner stays in the center of every step
- Use the staple gun again on loose sections
- Walk up and down the staircase slowly to test its safety
MyNewSurface wants us to remember how important this last check is. You want your stair runner to be safe for all people who use the stairs.
Pro Tips for a Flawless Stair Runner Installation
A clean stair runner is done best with care. It’s not about how fast you go. It is about staying focused. Many mistakes happen because homeowners try to hurry things. They may skip measuring again, rush the layout, or use poor fasteners. If you want to do a diy stair runner, go slow. Take your time when you work on alignment and tension.
The good news is, most of the usual problems can be bypassed with better planning. MyNewSurface has seen this in flooring jobs and remodeling all around Charlotte. When you do things step by step, it works better than taking shortcuts. The tips below will help you avoid mistakes. These are the mistakes that make the project look bad or cause it to wear out quickly.
Common Mistakes to Avoid on DIY Projects
Many diy stair runner problems begin before you put in the first staple. People often do not measure right. Sometimes, they get runner pieces that do not match in length. They may also forget the stairs can change shape down at the bottom. For a lot of people, visible mistakes happen because the runner isn’t centered or there isn’t enough pull as it goes on.
Often, there is trouble with how the runner is fixed in place. Tape is good to hold the rug pad, but it should never take the place of solid staples for the stair runner. Stair rods are nice for decoration, but you should not count on them to hold the runner down. They are there to look good, not to do the real work.
- Not measuring again and again before you buy
- Letting the stair runner move off center when you put it down
- Not using the staple gun enough where there is a lot of pull
- Cutting without making sure the edges won’t fray
- Depending on stair rods or tape when you need strong fastening
MyNewSurface helps people in Charlotte with their diy stair runner ideas by making sure the steps are done in order. They teach how materials move, and how the runner needs to fit right from the start.
Time-Saving Tricks from MyNewSurface Experts
A few smart shortcuts can help you save time and still keep the job good. MyNewSurface says it’s best to do your prep work all at once. That means you should cut the rug pad sections in batches, mark each stair spot before you start installing, and make sure your tools are close by. These small steps are important, especially when you work on a whole staircase.
An electric staple gun can save the most time out of all the tips shared. It pushes staples in better than normal hand tools do. It also makes the job run smoother and keeps you from getting annoyed. Painter’s tape is a simple trick, too. It helps you get fast visual lines for where to put the rug runner on every step.
- Use a cardboard template so you can cut each rug pad quick
- Mark the full path of the runner with painter’s tape before stapling
- Get your supplies first before making any Home Depot trips to stop delays
MyNewSurface follows this planning for Charlotte remodeling jobs. They know that good workflow can help make the work look clean and nice every time.
Conclusion
In the end, learning how to install a stair runner can make your home look better and feel more safe and comfy. If you follow the steps, you will find it easy to do this job and get a great finish. And if a runner is just the start and you want bigger changes, our complete staircase remodel guide covers the full process. MyNewSurface is always ready to help you. Whether you need to pick the right stair runner or want backup from staircase renovation experts, our team wants you to get a nice look for your Charlotte home. Feel free to contact us if you need help or want to see our products made just for you. Start making your space better today!
Frequently Asked Questions
How long does it take to install a stair runner on a typical staircase?
For most people, putting in a stair runner on a normal staircase takes about four hours. If you want to do it yourself, it may take more time if you have to pull out old carpet first or go to Home Depot more than once. Having a simple plan helps you finish the job faster and makes sure you use less time waiting around.
Should I use padding under my stair runner, and how is it installed?
Yes, the rug pad or carpet pad is good to use under a stair runner. It makes the steps softer and keeps the runner from moving. Cut the padding so that it fits each tread. Tape it down so it stays in place. Then use the staple gun to secure the stair runner over the pad. This is a simple step in your diy stair runner project.
How do I secure my stair runner to prevent slipping or bunching?
Put rug tape or carpet tape under the padding, but attach the stair runner to the stairs with staples. A staple gun, especially an electric staple gun, holds the rug much better than just tape. Keep the stair runner in the middle of every step. Pull the runner tight as you go up the steps. Use more staples if you see any loose parts, and do this before you finish the job.